Daring Bakers December Challenge: Stollen wreath

The 2010 December Daring Bakers’ challenge was hosted by Penny of Sweet Sadie’s Baking. She chose to challenge Daring Bakers’ to make Stollen. She adapted a friend’s family recipe and combined it with information from friends, techniques from Peter Reinhart’s book.........and Martha Stewart’s demonstration.

Stollen is a traditioal German christmas recipe. So I should be very happy to finally have the possibility to make something from my own cuisine, especially I am located in the middle of this pastry comes from. The town where I live now (and went to school) is just 30 km away from Dresden where the center of the Stollen tradition is located. Outside my home village (8 km away) was the famous 'Zeithainer Lustlager' where Augustus II the Strong had the giant 1.7 ton-Stollen in 1730 - read more at the 'Dresdner Stollen festival' section here.
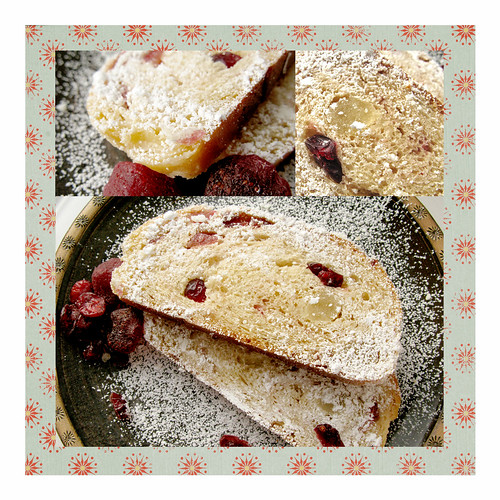
There is just one twist: I hate Stollen. I remember clearly every time in my childhood we were making it. I had to get up at six in the morning and stand in the kitchen for hours, wearing a headscarf and kneading tons of dough in big washing bowls, sinking into it as far as my elbows. We usually made around 10 to 12 large ones which were baked at the lokal bakery in our village. The best thing was covering them with butter and sugar because I would get the rests of  melted butter and sugar which were spilled around. I rarely ate a piece afterward because I don't like candied oranges or lemons and most of all raisins. So I though about making a Quark or poppy seed version (last year I made one with chocolate and almonds - the recipe is in German). Someone in the forum later mentionde dried fruits, so I changed my mind and tried my own version with dried cranberries (instead of raisins) and dried strawberries (instead of zests) soaked in Contreau (instead of rum). Finally I changed the almonds with macadamias and added a marzipan filling.
My mother-in-law who watched the baking procedure while knitting in the kitchen immediately fell in love with the smells evaporating from the oven and could't wait until the wreath was cooled for a taste. She asked me for the recipe afterwards. My brother on the other side, who is a real Stollen fan first refused to taste my version. After tasting a slice he stated that it wasn't bad but didn't deserved the name Stollen. "It is a nice yeast-dough bread and you can have butter or jam on it for breakfast, but don't call it Stollen." he said. I liked my creation (especially the untraditional shape) - maybe the Stollen and I will become friends at last ;)

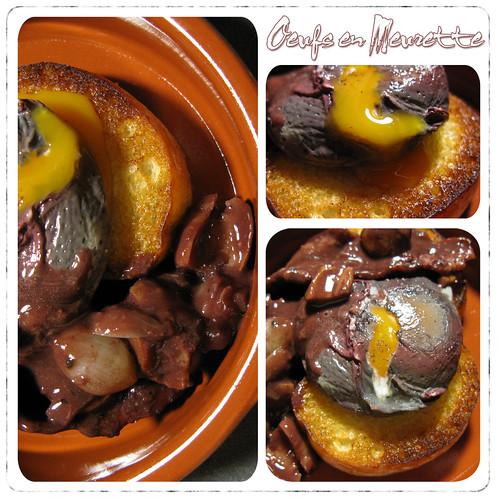
Daring Cooks December Challenge: Poaching Eggs - Oeufs en Meurette

Jenn and Jill have challenged The Daring Cooks to learn to perfect the technique of poaching an egg. They chose Eggs Benedict recipe from Alton Brown, Oeufs en Meurette from Cooking with Wine by Anne Willan, and Homemade Sundried Tomato & Pine Nut Seitan Sausages (poached) courtesy of Trudy of Veggie num num.

Well, I though poaching eggs wouldn't be that difficult - but I was wrong. I did some trys with water and never managed to get a uniform egg. Everything was splattered in the pan. Luckily the ones poached in wine got just right. I chose the Oefs en Meurette (not the eggs Benedict) because I love the French cuisine (it's a Burgundian dish), but it confirmed all my prejudices about the French kitchen. It tastes exquisit but you need lots of time, lots of different kitchen equipment (at least three different pans) and patience because it's difficult. I got a satisfying result a the end although I didn't follow the recipe literally. Thanks to Jenn and Jill for that nice dish I will surely cook again!

Oeufs en Meurette
makes four portions (I halved it)


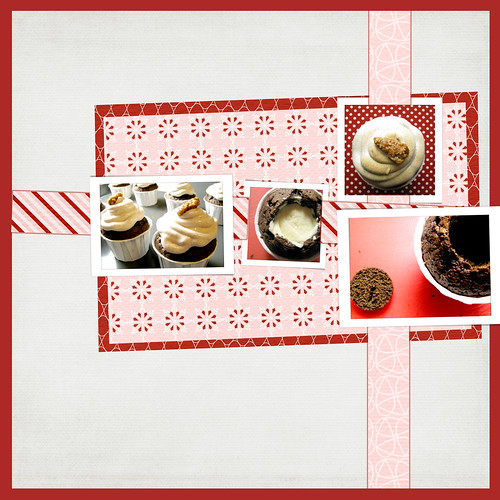
National Cupcake BackAthon: Gingerbread cupcakes with eggnog buttercream filling and cinnamon meringue

I confess this  some kind of elaborate, but I wanted more this time. First of all I wanted to make a good impression - because this is my post for the 'National Cupcake BackAthon' held by Baking the law. She invited me to take part and (of course) I couldn't say no. The topic is 'Gluttony at the christmas market' which gave me a lot of ideas. So second, I wanted to design a special cupcake, one I never made before, with filling and topping - and which was supposed to taste and look good. I adore this certain foodblog by Chockylit which is all about cupcakes. I love her cupcakes creations and wanted to create such a lovely and special cupcake as hers use to be. I hope I have done a good job in trying/doing so.


Gingerbread cupcakes with eggnog buttercream filling and cinnamon meringue
makes about 12 cupcakes 

Gingerbread cupcakes:
  • 100 g dark chocolate, minimum 61% cocoa
  • 115 g butter
  • 125 g sugar, granulated
  • 100 g dark molasses (sugar beet molasses; 'Zuckerrübensirup')
  • 4 eggs
  • 100 g flour
  • 15 g cocoa powder
  • 1 teaspoon baking powder
  • 2 teaspoon gingerbread spice mix ('Lebkuchengewürz')
  • 1/2 teaspoon ginger, grounded
  • pinch of salt
In a waterbath, melt butter and chocolate and stir until combined. Let the mixurte cool for about ten minutes. Meanwhile mix the dry ingredients. In a large bowl combine sugar and molasses, then add the chocolate-butter-mixture and whip (with a handheld mixer) until you get a caramel-like consistency. After that, beat in each egg separately. At the end add the dry ingredients and stir until (just) combined. Preahet your oven to 180°C, fill the dough into cupcake forms and bake for about 25 to 30 minutes. Let them cool on a rack.
Preparing for the filling: Press a small round cookie cutter in the middle of the cupcake and move it a little bit back and forth. Pull it out and gently remove the cone, then cut the top of it so that you have a small disc - it'll be your 'lid' after you put in the filling. You can enlarge/deepen the filling hole by using the back of a small sharp knife. Feed the crumbs to someone impatient and hungry (eg your boyfriend).

Eggnog buttercream filling:
Let the buttercream get room temparature (or use your microwave oven for that). Add the orange zest and egg liquer and beat until combined and creamy. Fill your cupcakes and put your 'lid' on top.
    Cinnamon meringue:
    • two egg whites, at room temperature
    • 1/4 teaspoon cream of tartar
    • 40 g white sugar
    • 1/2 teaspoon cinnamon, grounded 
    • twelve candied almonds 
    Combine sugar and cinnamon. Whisk your egg whites until foamy, then add cream of tartar. When soft peaks form, add sugar-cinnamon-mixture. Whisk until stiff and glossy. Fill into piping bag with a round tip and cover the tops of your cupcakes with it. Top/decorate each cupcake with a candied almond. Use a flame torch or the top heat/grill of your oven to brown the meringue - just be careful not to burn it (I set my oven to the lowest grill function and the rack on the bottom rack and watched ...).

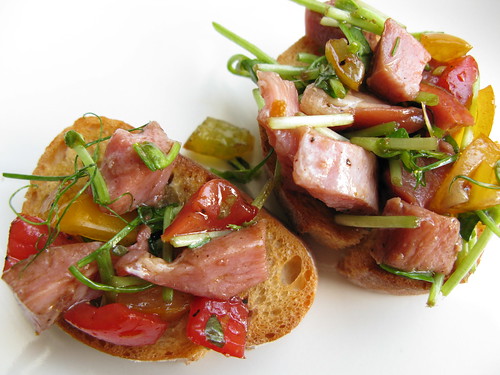
      Bruschetta mit geräucherter Entenbrust und Erbsensprossen

      Ich liebe die Metro. Wenn ich mal die Gelegenheit habe, dort einkaufen zu gehen, dann reicht die Zeit meistens gar nicht, all die schönen Dinge zu bestaunen, die es dort gibt. Meistens kaufe ich irgendetwas 'exotisches' aus der Obst- und Gemüseabteilung oder dem imposanten Kühlraum mit dem Fleisch. Bei meinem letzten Beutezug musste ich bei Erbsensprossen und geräucherter Entenbrust zugreifen. Schön, nun lag es in meinem Kühlschrank, aber was damit machen? Am Ende landete es wieder in der Kategorie 'Resteverwertung', nicht sehr glorreich aber trotzdem ein leckerer Abendsnack.


      Bruschetta mit geräucherter Entenbrust und Erbsensprossen
      für zwei Personen
      • eine geräucherte Entenbrust, fein gewürfelt
      • eine Handvoll Erbsensprossen, fein gehackt
      • acht Cocktailtomaten
      • eine halbe gelbe Paprikaschote, fein gewürfelt
      • zehn Scheiben Ciabatta oder 3 normales Brot
      • eine Knoblauchzehe
      • ein EL Olivenöl (für das Dressing)
      • ein halber EL guter Balsamicoessig
      • Salz und Pfeffer
      Das Brot mit etwas Öl besprenkeln und im Ofen knusprig rösten. Die Tomaten achteln, dabei den Saft und das Innere mit in die Schüssel geben. Entenbrust, Erbsensprossen, Paprika, Olivenöl und Essig dazugeben, mit Salz und Pfeffer würzen und ordentlich vermischen. Die Knoblauchzehe häuten und die Brotscheiben damit abreiben. Die Entenbrust-Gemüsemischung gleichmäßig auf den Scheiben verteilen.

      Daring Bakers November challenge: Crostata filled with persimmon mousse and raspberry jam

      The 2010 November Daring Bakers' challenge was hosted by Simona of briciole. She chose to challenge Daring Bakers' to make pasta frolla for a crostata. She used her own experience as a source, as well as information from Pellegrino Artusi's Science in the Kitchen and the Art of Eating Well.

      Crostata (tart) is an Italian dessert. The base of a crostata is pasta frolla(or pastafrolla), sweet short crust pastry (or sweet tart dough) made of flour, sugar, butter and eggs. Pasta frollais versatile: it provides the base to make crostata with fruit preserves, pastry cream, fresh fruit,ricotta, and other ingredients, and, by itself, it makes very nice cookies.

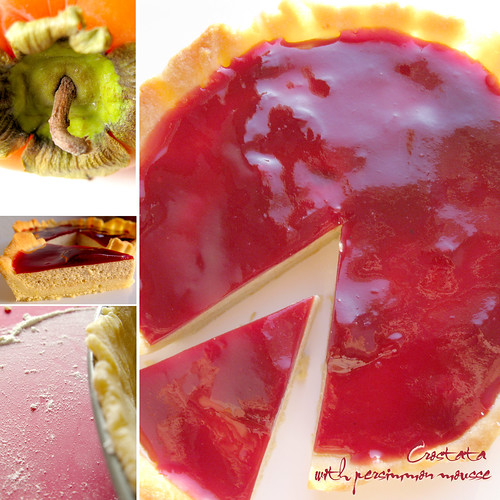
      Tarte should be a piece of cake for me, made them a dozen times, you can find them all here. I wasn't so fond of the idea of a whole sweet jam filling*, so I rather preferred blind baking and adding a filling afterwards. There are masses of possibilities for filling, I once for example made an apple cinnamon ice cream filling and topped it with marzipan. But I was looking for something new. I remembered a dessert recipe from one of my friends I liked very much. It's an apple mousse which is topped with a chocolate mousse or elderberry sauce. Apple seemed a little bit to plain so wanted something more fancy. Because I never used persimmons before I decided to gor for a persimmon-raspberry combination. The result was really smooth and tasty but took a lot of time (which involved a lot of waiting but was worth it).

      * In Austria such a tarte with jam filling and dough stripes on top for decoration is called 'Linzer Torte'.

      Crostata filled with persimmon mousse and raspberry jam


      Jamie Oliver: Jamie does

      Jamie Does...Actually I wanted to write that with this book I get the feeling to be fed up with my favourite chef. But as I was briefly skipping through the pages again, the enthusiasm grabbed me again. Especially the French and Morrocan section made my senses tingle - could almoust smell all the spices and feel the heat... The Swedish section was disappointing though, I think there are a lot better recipes typical for Sweden which do not contain fish. Therefore I recommend this one: Kitchen of Light: The New Scandinavian Cooking ;).
      All in all entertaining stories, great pictures and layout as always - maybe one of the best layouts so far. At the end stays just this tiny feeling of assembly-line work because Mr. Oliver is tossing out books in a row ... I'm missing the real passion in his newest books so to say (got the feeling it got lost on the way).

      Kürbissuppe mit schwarzen Bohnen

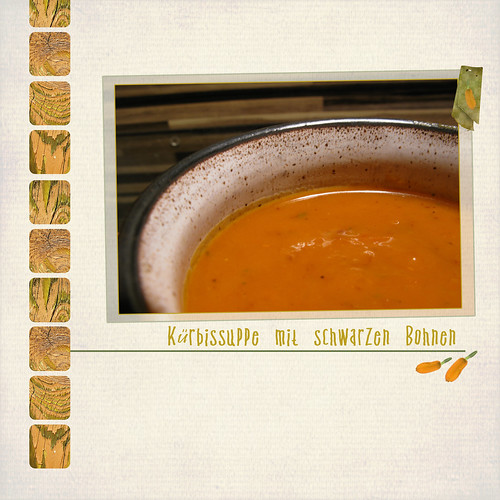
      Herbstzeit ist Kürbiszeit. So lagen erst kürzlich mehrere Butternut-Kürbisse in meiner Küche versammelt. Also was damit anfangen? Da kam mir unser alljährliches Abgrillen gerade recht, fand es doch am Abend vor Halloween statt. Was passt dazu besser als eine Kürbissuppe? Außerdem musste ich ungefähr 8-10 Portionen planen, damit war schon ein Kürbis verarbeitet. Ich wollte einen etwas exotischen Geschmack, und die leckere Kürbis-Orangen-Suppe, die ich schon einmal gekocht hatte fand ich nicht rustikal genug. Die Suppe mit Kokos und Garnelen war mir auch zu ausgefallen, also musste ein neues Rezept her. Im Kühlschrank hatte ich noch ein angefangenes Glas Tikka Masala-Paste, warum die nicht gleich verwenden. Für den etwas nussigeren Geschmack und die Sämigkeit sollten noch ein paar schwarze Bohnen mit hinein, da der Butternut-Kürbis doch wässriger als der Hokkaido-Kürbis ist. Insgesamt fand ich das Ergebnis gelungen, nur leider fand die Soljanka mehr Absatz. Warum wohl ;) ? Zur Suppe passt ganz ausgezeichnet Foccaccia mit Kürbiskernen, wer nicht so viel Zeit zum Backen hat kann auch fertiges Naan-Brot aus dem Supermarkt versuchen.


      Kürbissuppe mit schwarzen Bohnen
      für 8 Portionen
      • ein kleiner Butternuss-Kürbis, geschält, entkernt und in große Würfel geschnitten
      • zwei Dosen schwarze Bohnen, abgetropft
      • zwei Zwiebeln, grob gewürfelt
      • 750 ml Wasser
      • eine Dose ganze Tomaten
      • 80 g Tikka Masala Paste (zB von Patak)
      • ein Eßlöffel Öl
      • 50 g Zartbitter-Schokolade, grob geraspelt
      • Tabasco-Sauce, Salz & Pfeffer zum Abschmecken
      Die Paste im heißen Öl kurz anbraten bis sich die Aromen entfalten. Dann Hitze reduzieren und die Zwiebeln dazugeben und ca 3 Minuten dünsten, dann den Kürbis hinzugeben und ebenfalls kurz anbraten. Wasser und Tomaten unterrühren, salzen und das Ganze ca 15 Minuten kochen, der Kürbis sollte weich sein. Die Hälfte der Bohnen dazugeben und mit dem Pürierstab glatt pürieren, evt. Wasser nachgeben. Die restlichen Bohnen und die Schokolade einrühren und nochmal kurz kochen lassen. Mit Salz, Pfeffer und Tabasco-Sauce abschmecken.

      Daring Cooks November Challenge: Sweet Potato and Gruyère Soufflé

      Dave and Linda from Monkeyshines in the Kitchen chose Soufflés as our November 2010 Daring Cooks' Challenge! Dave and Linda provided many of their own delicious recipes plus a sinfully decadent chocolate soufflé recipe adapted from Gordon Ramsay's recipe found at the BBC Good Food website.

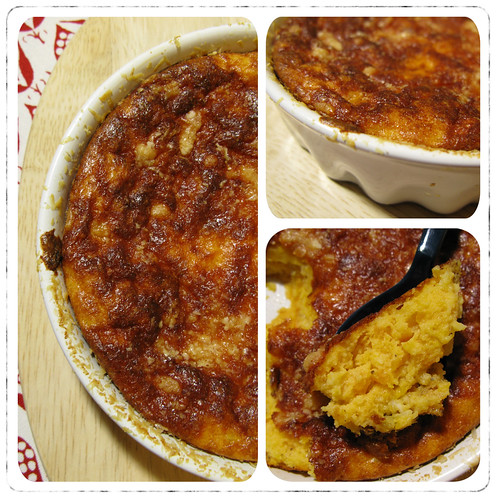
      I'd made soufflé once and not to mention it was a disaster (the whole open-the-door-and falling-together thing). To prevent further ones, I decided for a savoury recipe which wouldn't rise that much anyway. I spotted some really nice sweet potatoes at the supermarket and remembered I hadn't cooked something with them a long time - and I love sweet potatoes by the way (especially baked in the oven with some mozarella on top...). Luckily I found a recipe I could make a soufflé with them, and it was awesome. According to my boyfriend "einfach geil" what means 'simply wicked' ...


      Sweet Potato and Gruyère Soufflé (from Epicurious)
      • 1/2 cup/50 g freshly grated Parmesan
      • 1 cup/ 210 g finely chopped onion (about 3 medium-sized)
      • 1 large garlic clove, minced
      • 2 tablespoons/ 30 g unsalted butter
      • 2 tablespoons/15 g all-purpose flour
      • 1 cup/236 ml milk
      • 1 cup / 100 g coarsely grated Gruyère (about 3 ounces)
      • 2 cups /675 g mashed cooked sweet potatoes (about 2 big potatoes)
      • 4 large eggs, separated
      Butter a 1 1/2-quart soufflé dish and dust it with 1/4 cup of the Parmesan. In a large heavy saucepan cook the onion and the garlic with salt and pepper to taste in the butter over moderately low heat, stirring, until the onion is softened, stir in the flour, and cook the roux, stirring, for 3 minutes. Add the milk in a stream, whisking, and simmer the mixture, whisking, until it is thickened. Remove the pan from the heat, whisk in the Gruyère, whisking until the cheese is melted, and whisk in the sweet potatoes and the egg yolks, 1 at a time. In a bowl with an electric mixer beat the egg whites with a pinch of salt until they just hold stiff peaks, whisk one fourth of them into the sweet potato mixture to lighten it, and fold in the remaining whites gently but thoroughly. Pour the mixture into the prepared soufflé dish, sprinkle the remaining 1/4 cup Parmesan over it, and bake the soufflé in the middle of a preheated 375°F. oven for 45 to 50 minutes, or until it is puffed and golden. Serve the soufflé immediately.

      Notes: I don't have a soufflé dish, so I used two creme brulee moulds and a small casserole. We ate it as a main dish, but seved in the brulee moulds it would also be a nice accompaniment for meat (maybe even for a christmas dinner). Because I used smaller dishes it took only 35 minutes.

      Daring Bakers Oktober Challenge: Banana Crunch Doughnuts (filled with blueberry jam) and a family recipe

      The October 2010 Daring Bakers challenge was hosted by Lori of Butter Me Up. Lori chose to challenge DBers to make doughnuts. She used several sources for her recipes including Alton Brown, Nancy Silverton, Kate Neumann and Epicurious.

      At my region this kind of deep-fried stuff is called "Pfannkuchen" or "Berliner" (called after our capital of course). In carnival it's a kind of tradition to fill some of them with musturd - so if you're not lucky you'll find a very "special" one. During the last years you can also buy ones filled with egg nogg or chocolate but I prefer the traditional version with cherry or strawberry jam, covered with granulated sugar. Some use sugar glaze, but that's not how I like them. In my family we have a special recipe for "Quarkbällchen" what are small balls with a dough containing raisins and quark. I'll give you the recipe here, but I haven't made them in a while, so I unfortunately have no pictures what they are supposed to look like.
      I have made doughnuts before, especially because I adore the ones from Dunkin Donuts and wanted to recreate them. Unfortunately it's a 3 hours drive to Berlin which is the next place I can get the original ... My maple sirup version (yeast dough) was not bad but far from the taste I expected. So I decided this time to go for dough without yeast. Some time ago I found I recipe by Tartelette, one of my favourite blogs which was using bananas. I saved it amoung my 'I have to bake/cook this' list but never came to the point actually doing it - until now. As I wanted to make a filled and 'normal' version I decided for blueberry jam filling - you have to know that my favourite doughnut at Dunkin Donuts is the blueberry crunch doughnut ...


      Banana doughnuts with blueberry jam filling


      Daring Bakers August Challenge: Ice Cream Petit Fours with Brown Butter Pound Cake

      The August 2010 Daring Bakers' challenge was hosted by Elissa of 17 and Baking. For the first time, The Daring Bakers partnered with Sugar High Fridays for a co-event and Elissa was the gracious hostess of both. Using the theme of beurre noisette, or browned butter, Elissa chose to challenge Daring Bakers to make a pound cake to be used in either a Baked Alasa or in Ice Cream Petit Fours. The sources for Elissa's challenge were Gourmet magazine and David Lebovitz's "The Perfect Scoop".

      My ice cream machine-buy was no bad idea wasn't it? In this month's challenge I could use it again. The original recipe for the ice cream was vanilla flavour but I decided for cheesecake after tasting some crumbs of this delicious butter pound cake. Unfortunately my boyfriend didn't share my opinion - he doesn't like cheesecake at all and disliked the flavour combination at the first taste. I thought otherwise - I fell in love with it - cannot understand that there are really people who do NOT like cheesecake, the best cake ever ... I decided to go with white chocolate with some coconut shreds in it. The taste was all right, but of course the cake was shining through (should have thought about that before), the petit fours were great anyway (I'm going to post pictures of the ready ones later because I have to head to my mother-in-law...).

      Ice Cream Petit Fours (*Butterfinger* style)


      Pflaumen-Apfel-Cobbler

      Was macht man wenn man einen Korb Pflaumen erstanden hat und einen die Gelüste nach frischen Früchten nach kurzer Zeit verlassen? Kuchen? Pflaumenknödel nach Omas Spezialrezept? Das gab es doch erst letzte Woche bei Mutti .... Nein, gegen die Pflaumenknödel nach Familienrezept ist wirklich nichts einzuwenden. Meine Oma stammt aus dem ehemaligen Sudetenland und hat viele böhmische Rezepte mit in die Familienküche gebracht, so dass wir manchmal nicht nur sächsisch, sondern auch böhmisch gekocht haben. Jedes Jahr zur Hochsaison der Pflaumenzeit lädt meine Mutter zu Pflaumenknödeln ein, und die ganze Familie versammelt sich um einen Tisch. Die Vorbereitungen dazu laufen bereits Tage vorher und die Mengen die meine Mutter dabei produziert grenzen an die Produktion einer mittelgroßen Fabrik - meistens schaffen wir nur die Hälfe von dem, was in den beiden großen Töpfen gedämpft wurde, und einige Exemplare landen zum Glück in der Gefriertruhe, wo man sie bei Gelegenheit wieder hervorzaubern kann. Serviert werden die Knödel mit einer Pflaumentunke, zerlassener Butter und Zimt und Zucker. Ich liebe diese Geschmackskombination. An die zerlassene Butter konnte ich mich zwar nie so richtig gewöhnen, aber von Tunke mit Zucker und Zimt bekam ich nie genug. Die ganze Prozedur der Herstellung ist mir aber zu aufwändig nur für zwei Personen, ganz zu schweigen von den Dingen, die bei der Herstellung alle schief gehen können. Den Geschmack wollte ich aber wieder in einem Gericht erleben, nur was sollte ich machen?

      Außerdem waren da auch noch diese Äpfel die dringend weg müssen. Moment, Äpfel, da war doch was - genau, Apfel-Crumble. Funktioniert das auch mit Pflaumen? Kurze Recherche ...  ja, diese ganzen traditionellen englischen Crumble funktionieren mit fast jeder Fruchtkombination; und als Cobbler kann man sie sogar zum Hauptgang servieren.

      Daring Cooks August Challenge: Pierogi

      The August 2010 Daring Cooks Challenge was hosted by LizG of Bits n'Bites and Anula of Anula's Kitchen. They chose to challenge Daring Cooks to make pierogi from scratch and an optional challenge to provide one filling that best represents their locale.

      Pierogi are still one of my most vivid memory about my 5months-exchange-stay in Poland. At that time I was still going to discover my passion for cooking and making things from scratch. Usually I bought frozen stuff from the supermarket, and my favourite were pierogi. I guess I ate all kinds you can find there - sweet and savoury ones, filled with strawberries or meat or potatoes ... The sweet ones were topped with vanilla flavoured curd queese, and the savoury ones were served in an onion soup topped with sour cream. Every time I come back to Poland for a visit, I am taking a bag of them with me. One day I was even lucky enough to get a bunch of home-made pierogi from a Polish friend (staying in Germany for an exchange)- her grandma made them and it was nearly a sacrifice for her to give them to me. So sorry girls, I am not going to mess with the traditional Polish recipe in honor of my melancholic memories of the most delicious Polish food I can remember. I'm keeping with the original.


      Schweinshaxen-Risotto mit Backpflaumen und Champignons

      Normalerweise steht deutsche Hausmannskost sehr selten auf meinem Speiseplan. Ab und zu mag ich es dennoch deftig und esse mal eine Scheibe Blutwurst auf's Brot oder es gibt Grützwurst mit Sauerkraut und Kartoffeln - aber das ist eher die Ausnahme. Eisbein habe ich noch nie gegessen, und auch die Schweinshaxe wollte ich nie auf meinem Teller haben - solche deutschen Spezialitäten gab es nie bei mir zu Hause und waren wegen des Fettanteils und der umständigen Zubereitung nie ein Wunschgericht. In meinem Kopf entstanden bei 'Eisbein' oder 'Schweinshaxe' immer Klischeebilder von dicken Leuten mit fetttriefenden Fleischbatzen im Mund vor meinem inneren Auge - nein danke!
      Letztens ging ich allerdings in meinem Supermarkt am Kühlregal vorbei und entdeckte fertig zubereitete und abgepackte Schweinshaxen, die optisch gar nicht mal so schlecht aussahen. In diesem Moment bekam ich wahnsinnig Appetit auf Fleisch, zumal es ja schon fertig zubereitet war und ich keine Lust auf großartige Bratexperimente hatte. Also landete das gute Stück im Wagen, genauso wie eine Packung appetitliche braune Champignons aus der Gemüseabteilung. Zu diesem Zeitpunkt hatte ich - wie meistens - noch keine konkrete Vorstellung was ich damit machen wollte. Zu Hause schaute ich mit meine Ausbeute an und war ein bisschen ratlos - Kartoffeln waren keine da, also was dazu essen? Es gab da so ein Rezept in meinem Risottobuch mit Schweinefleisch ... also warum nicht auch ein Risotto mit Haxe? Ich kramte noch ein paar Backpflaumen aus meinen Vorräten hervor, deren überraschend guten Geschmack ich erst entdeckt hatte und in Kombination mit Kaninchen (in diesem Rezept) schon als ausgezeichnet im Hinterkopf vermerkt hatte. Ich kannte einige Schweinefilet-mit-Dörrobst-Kreationen, warum also keine Backplaumen ... Das Ergebnis war eine geschmacklich gut kombinierte Variante eines 'Deutschen-Hausmannskost-Risottos' und ich würde es beim nächsten 'Haxen-Hunger' auch wieder machen.


      Sweet (Ice Cream)Dreams

      Durch meine kleine Foodblog-Besessenheit war ich irgendwann auf das Blog von David Lebovitz gestossen, besser gesagt zuerst auf das Rezept seiner Salted Butter Caramel Ice Cream - ein Traum in Eis für Karamellliebhaber wie mich. Also war der Plan, irgendwann eine Eismaschine anzuschaffen - wohin dann in unserer kleinen Küche damit, war mir aber unklar, also blieb die Planung an diesem Punkt stehen. Bis letzten Monat, als ich (wieder einmal genötigt durch meine monatlich Daring Bakers Challenge) plötzlich eine Eiscreme-Torte herstellen musste. Ok, da war die Sache natürlich 'gegessen', die Maschine musste her. Ich wollte gerne eine mit Kompressor, denn auf 24h lang Kühlbehälter im Gefrierschrank langern hatte ich keine Lust, noch dazu wo ich nie Platz habe ;) Nach kurzer Suche fanden wir auch eine passende Eismaschine von Unold, die es gerade bei amazon im Angebot gab. Das passende Buch dazu war auch schnell gefunden und gleich mitgeordert - 'The perfect scoop' - natürlich von oben genanntem Eiscreme-Gott.

      Noch an dem Tag wo unsere neue Erungenschaft eintraf, wurde mit der Produktion begonnen - zwei Rezepte (und die entscheidenede Challenge mit der Eiscreme-Torte) gibt es hier. Das einzige Problem sind die Unmengen an Eigelb die man für die Eisherstellung braucht. Da ich aber bald Unmengen an Meringue-Buttercreme herstellen werde, geht es am Ende dann doch wieder auf. Dazu später mehr.

      Daring Bakers July Challenge: Swiss Swirl Ice Cream Cake

      The July 2010 Daring Bakers' challenge was hosted by Sunita of Sunita's world - life and food. Sunita challenged everyone to make an ice-cream filled Swiss roll that's then used to make a bombe with hot fudge. Her recipe is based on an ice cream cake recipe from Taste of Home.

      Well ... I am feeling a little bit sick today. After licking a dozen spoons (can't help myself) covered with sugar and cream-containing mixtures I am not excited any more about the ice cream cake forming into my freezer. If you ask me now, no more ice cream for me ... Just a few days earlier, I was jumping for joy because my ordered ice machine had arrived. Yes, I ordered an ice machine - not only for the challenge, I had been playing with this thougt for a while, and this month's challenge was the last straw (like the crepe pan - thanks again ;). Of course I had to have the suitable book too - I guess if you have been (food)blogging and reading for a while, you know David Lebovitz. I read this name for the first time as someone mentioned making one of his ice cream recipes, particularly this salted butter caramel ice cream. Not to mention this site has been among my favourites ever since. Of course I ordered The perfect scoop too. I gained two pounds just from looking at the recipes in this book, but nevermind. Luckily I prepared two different ice creams bearing the challenge in mind. Not the caramel one which should be eaten just pure ... I chose a salty caramel sauce instead of the hot fudge. It turned out to be very fluid so maybe I'll keep with the original recipe next time.

      Yesterday I recognised it was already the 26th and I had to finish and post the challenge today. The cake is still freezing and not ready to serve - and I couldn't eat a piece to be honest. I am going to taste and make pictures during my next craving for chocolate and sweet stuff, I promise. (Note from the 28th of July: My never-tired-of-sweet-stuff boyfriend completed the task for me, he managed to eat a whole piece of this calorie bomb. During cutting, serving and photographing the cake I had some serious tilting- and melting-promblems but I got at least one good shot displayed beneath.)


      Daring Cooks July Challenge: Nut butters

      The July 2010 Daring Cooks' Challenge was hosted by Margie of More Please and Natashya of Living in the Kitchen with Puppies. They chose to challenge Daring Cooks to make their own nut butter from scratch, and use the nut butter in a recipe. Their sources include Better with Nut Butter by Cooking Light Magazine, Asian Noodles by Nina Simonds, and Food Network online.
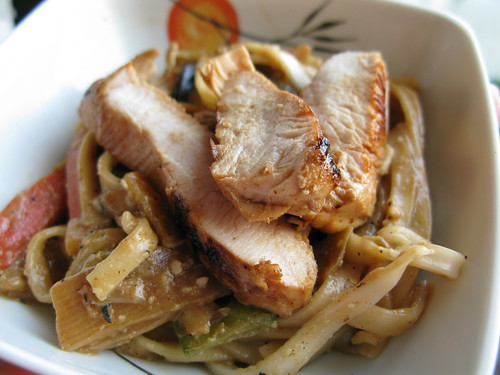
      This month I missed the Cooks challege because I was hiking in the Norwegian woods. We came back at the 14th, I had to go to work the next day and do a 24h duty, so there was no time left for cooking and presenting. A few deays later I catched up on the challenge. I don't wanted to miss the great idea of a dich with a creamy sauce just made out of nuts. I had some cashews, 'asian-style' vegetables in the freezer and some Mie noodles left, so I made a tasty leftovers dish. I guess I am going to make an ice cream with the rest of my butter, so thanks to Margie and Natashya for this challenge!
      Turkey with Mie noodles in cashew (nut butter) sauce (recipe below)

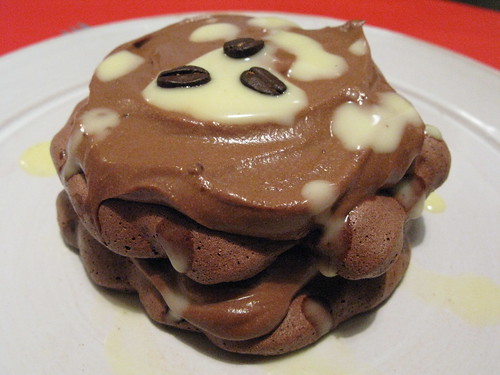
      Daring Bakers June Challenge: Chocolate Pavlovas with chocolate mascarpone mousse

      The June 2010 Daring Bakers' challenge was hosted by Dawn of Doable and Delicious. Dawn challenged the Daring Bakers' to make Chocolate Pavlovas and Chocolate Mascarpone Mousse. The challenge recipe is based on a recipe from the book Chocolate Epiphany by Francois Payard.

      Once again I am late - too late. As you may see at the date of the picture, I actually made the pavlova some days before posting date but due to a congress visit I wasn't able to post it until now.
      Once again the challenge was something I dealt with and failed before. Usually I buy meringue because I never get it solid enough, mostly it just deflates and becomes a mess. This time it was the best meringue I have ever made and even tasted better than the bought ones, but I never have eaten a chocolate one before. I guess the secret was that I separated the eggs a day before and let the egg whites get room temperature before starting - something someone mentioned to be important in the macaron challenge. At least, the cream and the base where delicious for themselves, but combined it was way to much chocolate for me, so I ate both separately.

      Note before starting: The Crème Anglaise should be made a day before the pavlova.

      Chocolate Meringue (for the chocolate Pavlova)
      • 3 large egg whites
      • ½ cup plus 1 tbsp (110 grams) white granulated sugar
      • ¼ cup (30 grams) confectioner's (icing) sugar
      • 1/3 cup (30 grams) Dutch processed cocoa powder
      Place a rack in the center of the oven and preheat to 200º F (95º C) degrees. Line two baking sheets with silpat or parchment and set aside. Put the egg whites in a bowl and whip until soft peaks form. Increase speed to high and gradually add granulated sugar about 1 tbsp at a time until stiff peaks form. (The whites should be firm but moist.) Sift the confectioner's sugar and cocoa powder over the egg whites and fold the dry ingredients into the white. (This looks like it will not happen. Fold gently and it will eventually come together.) Fill a pastry bag with the meringue. Pipe the meringue into whatever shapes you desire. Alternatively, you could just free form your shapes and level them a bit with the back of a spoon. Bake for 2-3 hours until the meringues become dry and crisp. Cool and store in an airtight container for up to 3 days.

      Chocolate Mascarpone Mousse (for the top of the Pavlova base)
      • 1 ½ cups (355 mls) heavy cream (cream with a milk fat content of between 36 and 40 percent)
      • grated zest of 1 average sized lemon
      • 9 ounces (255 grams) 72% chocolate, chopped
      • 1 2/3 cups (390 mls) mascarpone
      • pinch of nutmeg
      • 2 tbsp (30 mls) Grand Marnier (or orange juice, I used Contreau)
      Put ½ cup (120 mls) of the heavy cream and the lemon zest in a saucepan over medium high heat. Once warm, add the chocolate and whisk until melted and smooth. Transfer the mixture to a bowl and let sit at room temperature until cool. Place the mascarpone, the remaining cup of cream and nutmeg in a bowl. Whip on low for a minute until the mascarpone is loose. Add the alcohol or juice and whip on medium speed until it holds soft peaks (do not overbeat as the mascapone will break). Mix about ¼ of the mascarpone mixture into the chocolate to lighten. Fold in the remaining mascarpone until well incorporated. Fill a pastry bag with the mousse. Again, you could just free form mousse on top of the pavlova.

      Mascarpone Cream (for drizzling)
      • 1 recipe crème anglaise
      • ½ cup (120 mls) mascarpone
      • 2 tbsp (30 mls) Sambucca (optional)
      • ½ cup (120 mls) heavy cream
      Prepare the crème anglaise. Slowly whisk in the mascarpone and the Sambucca and let the mixture cool. Put the cream in a bowl and beat with electric mixer until very soft peaks are formed. Fold the cream into the mascarpone mixture.

      Crème Anglaise (a component of the Mascarpone Cream above)
      • 1 cup (235 mls) whole milk
      • 1 cup (235 mls) heavy cream
      • 1 vanilla bean, split or 1 tsp pure vanilla extract
      • 6 large egg yolks
      • 6 tbsp (75 grams) sugar
      In a bowl, whisk together the egg yolks and sugar until the mixture turns pale yellow. Combine the milk, cream and vanilla in a saucepan over medium high heat, bringing the mixture to a boil. Take off the heat. .Pour about ½ cup of the hot liquid into the yolk mixture, whisking constantly to keep from making scrambled eggs. Pour the yolk mixture into the pan with the remaining cream mixture and put the heat back on medium. Stir constantly with a wooden spoon until the mixture thickens enough to lightly coat the back of a wooden spoon. Remove the mixture from the heat and strain it through a fine mesh sieve into a bowl. Cover and refrigerate until the mixture is thoroughly chilled, about 2 hours or overnight.

      Assembly
      Pipe the mousse onto the pavlovas and drizzle with the mascarpone cream over the top. Dust with confectioner's sugar and fresh fruit if desired.

      Daring Cooks June Challenge: Pâtés and Bread

      Our hostesses this month, Evelyne of Cheap Ethnic Eatz, and Valerie of a The Chocolate Bunny, chose delicious pate with freshly baked bread as their June Daring Cook's challenge! They've provided us with 4 different pate recipes to choose from and are allowing us to go wild with our homemade bread choice.

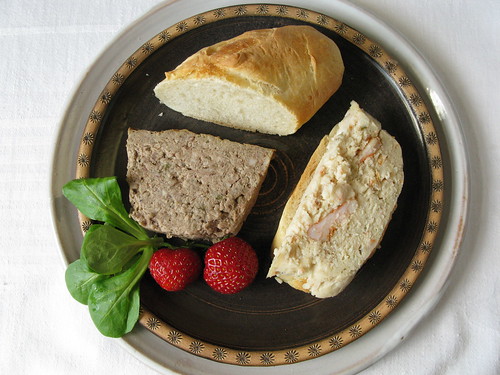
      I liked this month's idea a lot. Some time ago a friend of mine brought a terrine to a party we had and I loved it - of course I nagged my boyfriend to buy me a LeCreuset terrine mould afterwards ... This friend likes to make movies and as he was thiniking about an idea for a new one I told him that I was blogging and that he maybe could make a short film about his cooking adventures which inspired him to make this little masterpiece (of course he chose the terrine I mentioned to be the subject of choice):


      I chose to make two different pâtes and the French baguette which was more time consuming than I thought it would be. Thanks to the challenge I now own a porcellain terrine mould which will be used also in the future ...

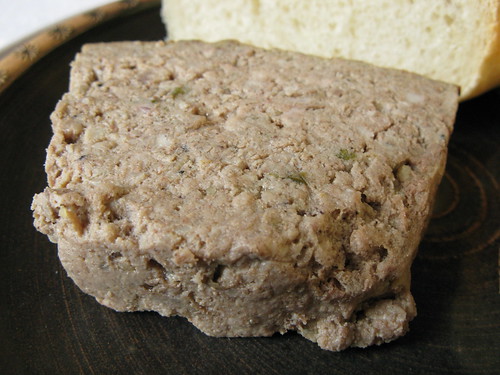
      Chicken Liver Terrine
      slightly adapted from Stéphane Reynaud's Terrine


      Yields one 25 by 12,5 cm (10 by 5 inch) terrine or loaf pan
      • 1 tbsp duck fat, or butter
      • 2 onions, coarsely chopped
      • 300g (11 oz) chicken livers, trimmed
      • 3 tbsp brandy, or any other liqueur (optional)
      • 100g (3 1/2 oz, 1/2 cup) smoked bacon, diced
      • 300g (11 oz) boneless pork belly, coarsely ground
      • 200g (7 oz) boneless pork blade (shoulder), coarsely ground (or ground pork see note below)
      • 2 shallots, chopped
      • 1 tsp quatre-épices (or 1/4tsp each of ground pepper, cloves, nutmeg and ginger is close enough)
      • 2 eggs
      • 200 ml (7 fl oz, 3/4 cup + 2 tbsp) heavy cream
      • 2 fresh thyme sprigs, chopped
      • Salt and pepper
      If you cannot find ground pork belly or blade, buy it whole, cut it into chunks, and pulse in the food processor. You can also replace the pork blade with regular ground pork (that is what I did). I don't own a food processor which is strong enough to cut meat, so I used an old meat mincing machine - that is why I got a more coarse result.
      Preheat oven to 200ºC (400ºF, Gas Mark 6). Melt the fat or butter in a heavy frying pan over low heat. Add the onions and cook, stirring occasionally, for 5 minutes, until softened. Add the chicken livers and cook, stirring frequently, for about 5 minutes, until browned but still slightly pink on the inside.Remove the pan from heat. Pour in the brandy, light a match and carefully ignite the alcohol to flambé. Wait for the flames to go out on their own, carefully tilting the pan to ensure even flavoring. Set aside. Put the minced pork belly and blade in a food processor, then add the onion-liver mixture and the chopped shallots, and pulse until you obtain a homogenous mixture - make sure not to reduce it to a slurry.Transfer to a bowl, and gradually stir in the chopped bacon, quatre-épices, cream, eggs, and thyme. Season with salt and pepper, and mix well. Spoon the mixture into a terrine or loaf pan, and cover with the terrine lid or with aluminum foil. Prepare a water bath: place the loaf pan in a larger, deep ovenproof dish (such as a brownie pan or a baking dish). Bring some water to a simmer and carefully pour it in the larger dish. The water should reach approximately halfway up the loaf pan. Put the water bath and the loaf pan in the oven, and bake for 2 hours. Uncover and bake for another 30 minutes. The terrine should be cooked through, and you should be able to slice into it with a knife and leave a mark, but it shouldn't be too dry. Refrigerate, as this pâté needs to be served cold. Unmold onto a serving platter, cut into slices, and serve with bread.

      Note: This pâté freezes well. Divide it into manageable portions, wrap tightly in plastic film, put in a freezer Ziploc bag, and freeze. Defrost overnight in the fridge before eating. - I made this pâte two weeks ago, ate some and froze the rest - for the pictures I defrostet two slices and they nearly tasted the same compared to the fresh pâte.

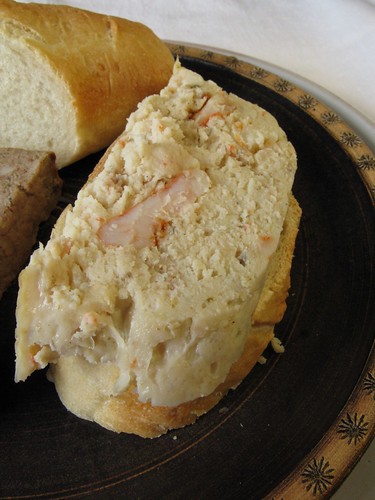
      Trout and Shrimp Pâté


      Yields one 6x3 inch (15x7,5 cm) terrine or loaf pan
      • 1 tbsp / 15 ml butter
      • 1/4 lb / 4 oz / 120g medium raw shrimp, deveined, shelled and tailed (about 12 medium shrimp)
      • 1/8 cup / 30ml Grand Marnier (or cognac, I used Contreau) (optional)
      • 1/2 lb / 8 oz / 240g trout filet, skinned and cut into thick chunks
      • 1/4 lb / 4 oz / 110g raw shrimp, deveined, shelled and tailed (any size)
      • 3/4 cup / 180ml heavy cream
      • Salt, to taste
      • Green peppercorn, coarsely ground, to taste
      • Chives, for garnish
      Preheat oven to 375ºF (190ºC). In a heavy, flameproof frying pan, melt the butter over medium-high heat. Sauté the 1/4 pound of medium shrimp, stirring often, until pink and cooked through. Remove the pan from heat. (These shrimp will be used to form layers within your pâté. If you feel they are too thick - you might want to slice them in half lengthwise.) Pour the Grand Marnier over the cooked shrimp. Light a match and carefully ignite the alcohol, to flambé the shrimp. Wait for the flames to go out on their own, carefully tilting the pan to ensure even flavoring. Set aside. Put the trout and the remaining raw shrimp in a food processor and pulse. Gradually pour in the cream and keep pulsing until you obtain a smooth mixture that is easy to spread, but not too liquid (you may not need to use all the cream). Season with salt and green pepper. Butter a 6x3 inch (15x7,5 cm) loaf pan or terrine, then line it with parchment paper. Spoon in half the trout mixture, and spread it evenly. Place the flambéed shrimp on top, in an even layer, reserving 3 or 4 shrimp for decorating. Top with the remaining trout mixture.Prepare a water bath: place the loaf pan in a larger, deep ovenproof dish (such as a brownie pan or a baking dish). Bring some water to a simmer and carefully pour it in the larger dish. The water should reach approximately halfway up the loaf pan. Put the water bath and terrine in the oven, and bake for 35 minutes. The pâté should be cooked through and firm in the center.

      Unfortunately I couldn't find ready prepared raw trout filet, so I had to buy whole fishes and filet myself - a little bit disgusting, I don't like my food starring at me ...

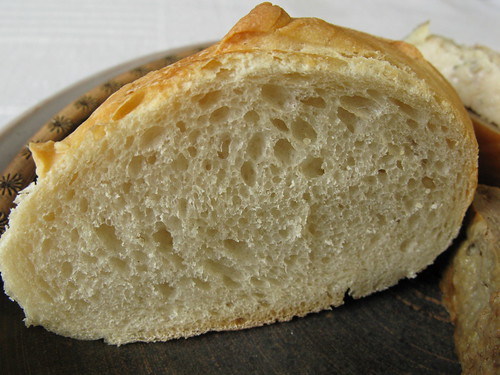
      French Baguette
      from King Arthur Flour


      yield: Three 16" baguettes

      Starter
      • 1/2 cup / 120 ml cool water
      • 1/16 teaspoon active dry yeast
      • 1 cup / 240 ml flour
      Dough
      • 1 tsp / 5 ml active dry yeast
      • 1 cup to 1 1/4 cups / 240 ml to 300 ml lukewarm water
      • all of the starter
      • 3 1/2 cups / 840 ml flour
      • 1 1/2 tsp / 7 ml salt
      Make the starter by mixing the yeast with the water, then mixing in the flour to make a soft dough. Cover and let rest at room temperature for about 14 hours; overnight works well. The starter should have risen and become bubbly. Mix active dry yeast with the water and then combine with the starter, flour, and salt. Mix and knead everything together-by hand, mixer or bread machine set on the dough cycle-till you've made a soft, somewhat smooth dough; it should be cohesive, but the surface may still be a bit rough. Knead for about 5 minutes on speed 2 of a stand mixer. Place the dough in a lightly greased medium-size bowl, cover the bowl, and let the dough rise for 3 hours, gently deflating it and turning it over after 1 hour, and then again after 2 hours. Turn the dough out onto a lightly greased work surface. Divide it into three equal pieces. Shape each piece into a rough, slightly flattened oval, cover with greased plastic wrap, and let them rest for 15 minutes. Working with one piece of dough at a time, fold the dough in half lengthwise, and seal the edges with the heel of your hand. Flatten it slightly, and fold and seal again. With the seam-side down, cup your fingers and gently roll the dough into a 15" log. Place the logs seam-side down onto a lightly greased or parchment-lined sheet pan or pans. Cover them with a cover or lightly greased plastic wrap, and allow the loaves to rise till they've become very puffy, about 1 1/2 hours. Towards the end of the rising time, preheat your oven to 450ºF (240ºC). Using a very sharp knife held at about a 45° angle, make three 8" vertical slashes in each baguette. Spritz the baguettes heavily with warm water; this will help them develop a crackly-crisp crust. Bake the baguettes until they're a very deep golden brown, 25 to 30 minutes. Remove them from the oven and cool on a rack. Or, for the very crispiest baguettes, turn off the oven, crack it open about 2", and allow the baguettes to cool in the oven.

      Making this takes time. More than I thougt. So if you are planning to bake baguettes, start early. There are lots of videos with recipes at YouTube where you can find several way of making them - the dough always has to rest at some points during the process, just have a look and decide which method suits your routine best.


      Today we finally had our French 'lunch' with the two pâtes, the baguette(s) and some fresh salad. I really enjoyed it!

      Daring Bakers May Challenge: Croquembouche

      The May 2010 Daring Bakers' challenge was hosted by Cat of Little Miss Cupcake. Cat challenged everyone to make a piece montée, or croquembouche, based on recipes from Peter Kump's Baking School in Manhattan and Nick Malgieri.

      This month's challenge recipe is for a Piece Montée, which means literally "mounted piece." You may know this dessert by another name - Croquembouche ("crunch in the mouth"). The piece montée is the traditional wedding cake in France (how suitable - I have been to two weddings this month). The classic piece montée is a high pyramid/cone made of profiteroles (cream-filled puff pastries) sometimes dipped in chocolate, bound with caramel, and usually decorated with threads of caramel, sugared almonds, chocolate, flowers, or ribbons.

      As I first saw the challenge I though "Oh no, they did it again. Something I would never ever think of to make myself because it looks so difficult!" A Croquembouche was the first thing I saw when I opened my first (and only) dessert cookbook - and which was the reason I bought it at all (because I loved that picture). I showed it to everybody who showed the slightest interest in that book, always saying "Isn't that beautiful?" Now I have to do it myself, so here we go again ;) Thanks for the challenge Cat, despite for the first batch of profiteroles which turned out to be little ufos (and my kitchen being a mess afterwards), it was a pleasure (but thats how we learn, right?).

      Chocolate Coffee Crème Patissiere (Half Batch)
      • 1 cup (225 ml.) whole milk + 50 ml
      • 2 Tbsp. cornstarch
      • 6 Tbsp. (100 g.) sugar
      • 1 large egg
      • 2 large egg yolks
      • 2 Tbsp. (30 g.) unsalted butter
      • 1 Tsp. Vanilla
      • 11/2 Tsp. instant espresso powder
      • 80 g chocolate, finely chopped
      Dissolve cornstarch in ¼ cup of milk. Combine the remaining milk with the sugar in a saucepan; bring to boil; remove from heat. Beat the whole egg, then the yolks into the cornstarch mixture. Pour 1/3 of boiling milk into the egg mixture, whisking constantly so that the eggs do not begin to cook.Return the remaining milk to boil. Pour in the hot egg mixture in a stream, continuing whisking. Heat the milk into a bowl (or pan) and add the chocolate and the instant espresso powder. Continue whisking the cream (this is important - you do not want the eggs to solidify/cook) until it thickens and comes to a boil. Stir until completely dissolved. Remove the cream from heat and beat in the butter, vanilla and the chocolate-espresso-mix.

      Dulce de leche Crème Patissiere (Half Batch)

      • 1 cup (225 ml.) whole milk
      • 2 Tbsp. cornstarch
      • 50g sugar
      • 100g Dulce de leche
      • 1 large egg
      • 2 large egg yolks
      • 20 g unsalted butter
      • 1 Tsp. Vanilla
      Instructions as above, add the dulce the leche together with the butter and the vanilla.

      Pate a Choux (profiteroles)
      yields about 28
      • ¾ cup (175 ml.) water
      • 6 Tbsp. (85 g.) unsalted butter
      • ¼ Tsp. salt
      • 1 Tbsp. sugar
      • 1 cup (125 g.) all-purpose flour
      • 4 large eggs
      • for Egg Wash: 1 egg and pinch of salt
      Pre-heat oven to 425◦F/220◦C degrees. Line two baking sheets with parchment paper. Combine water, butter, salt and sugar in a saucepan over medium heat. Bring to a boil and stir occasionally. At boil, remove from heat and sift in the flour, stirring to combine completely.Return to heat and cook, stirring constantly until the batter dries slightly and begins to pull away from the sides of the pan.Transfer to a bowl and stir with a wooden spoon 1 minute to cool slightly. Add 1 egg. The batter will appear loose and shiny. As you stir, the batter will become dry-looking like lightly buttered mashed potatoes. It is at this point that you will add in the next egg. Repeat until you have incorporated all the eggs. It'll be done when a wooden spoon stands upright on it's own into the batter (my first try was to fluid ...). If not, you added the eggs too fast. Stir until it thickens.

      Transfer batter to a pastry bag fitted with a large open tip (I piped directly from the bag opening without a tip). Pipe choux about 1 inch-part in the baking sheets. Choux should be about 1 inch high about 1 inch wide.Using a clean finger dipped in hot water, gently press down on any tips that have formed on the top of choux when piping. You want them to retain their ball shape, but be smoothly curved on top. Brush tops with egg wash (1 egg lightly beaten with pinch of salt). Bake the choux at 425◦F/220◦C degrees until well-puffed and turning lightly golden in color, about 10 minutes. Lower the temperature to 350◦F/180◦C degrees and continue baking until well-colored and dry, about 20 minutes more. Remove to a rack and cool.

      Assembly of your Piece Montée:

      When you are ready to assemble your piece montée, using a plain pastry tip, pierce the bottom of each choux. Fill the choux with pastry cream using either the same tip or a star tip, and place on a paper-lined sheet. Choux can be refrigerated briefly at this point while you make your glaze.

      Hard Caramel Glaze
      • 1 cup (225 g.) sugar
      • ½ teaspoon lemon juice
      Combine sugar and lemon juice in a saucepan with a metal kitchen spoon stirring until the sugar resembles wet sand. Place on medium heat; heat without stirring until sugar starts to melt around the sides of the pan and the center begins to smoke. Begin to stir sugar. Continue heating, stirring occasionally until the sugar is a clear, amber color. Remove from heat immediately; place bottom of pan in ice water to stop the cooking. Use immediately.You may want to lay out your unfilled, unglazed choux in a practice design to get a feel for how to assemble the final dessert. For example, if making a conical shape, trace a circle (no bigger than 8 inches) on a piece of parchment to use as a pattern. Then take some of the larger choux and assemble them in the circle for the bottom layer. Practice seeing which pieces fit together best.

      Once you are ready to assemble your piece montée, dip the top of each choux in your glaze (careful it may be still hot!), and start assembling on your cake board/plate/sheet. Continue dipping and adding choux in levels using the glaze to hold them together as you build up. (You may want to use toothpicks to hold them in place).When you have finished the design of your piece montée, you may drizzle with remaining glaze or use ribbons, sugar cookie cut-outs, almonds, flowers, etc. to decorate. Have fun and enjoy! Bon appétit!


      Note: As I wanted to take the Croquembouche to a birthday party with me which was two days later (or better will be in two days at the 29th) the only chance to store it without falling apart was the freezer. So I wrapped it in cling film and hope it will survive - if not, there is still enough filling left to have another one.

      Daring Cooks May Challenge: Enchiladas

      Our hosts this month, Barbara of Barbara Bakes and Bunnee of Anna+Food have chosen a delicious Stacked Green Chile & Grilled Chicken Enchilada recipe in celebration of Cinco de Mayo! The recipe, featuring a homemade enchilada sauce was found on www.finecooking.com and written by Robb Walsh.


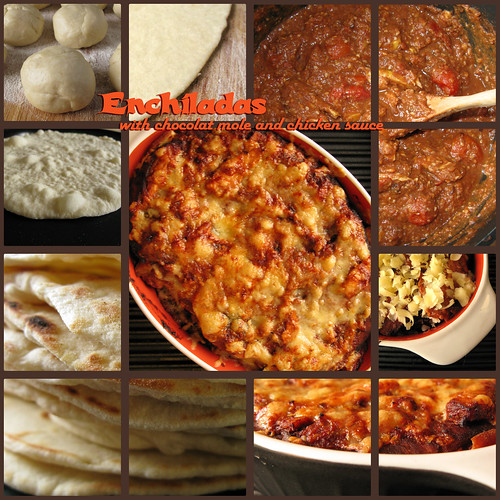
      Uff, Mexican food. I have bad memories about it - being in Norway and everyone eating that store-bougt Fajitas tasting like coming straight from the labaratory. But well, the Daring challenge recipes alway turn out to taste great so I gave it a try. The challenge was to make a home made enchilada sauce and (optional) tortillas. The recipe given was with green chiles and tomatillos and looked tempting, but I found only canned tomatillos offered in online stores with delivery times of 2 weeks and shipping charges twice the price of the tomatillos. So I decided for one of the recipes given as links - chocolate mole - from one of my favourite foodblogs. A long time ago I watched this movie about the Mexican painter, Frida Kahlo, in which the mole played a substantial role (concerning the food consumed) and ever since I wondered what this mole may be. Now the mystery of the famous Mexican mole was to be discovered by me!

      Flour tortillas
      • 3 cups (375g) unbleached flour
      • 2 tsp. baking powder
      • 1 tsp. salt
      • 4-6 Tbsp. (60 g) vegetable shortening or lard
      • about 1 1/4 cups (200 ml) warm water
      Mix dry ingredients in a large bowl. Add vegetable shortening or lard. Use a fork or a pastry cutter to cut in the shortening or just do it the old fashioned way and use your hands. Add warm water a little at a time until your dough is soft and not sticky. Knead the dough for a few minutes. Now you will pull off pieces of dough to form about 12 small dough balls.Let them rest for at least 10 minutes. Heat up the pan (I used my crepe pan) to medium to high heat.Now you can roll out the dough with your rolling pin, dust each ball with a little flour just before you roll them out. Roll them out fairly thin. Lay your tortilla on the hot pan. It takes just a few seconds to cook. Flip to the other side. When they are done it should have lots of nice brown speckles.

      Chocolate Mole Sauce
      adapted from David Lebovitz
      • 2 roasted chiles, skinned, seeds removed
      • 1/3 cup (25g) sliced almonds
      • 1 small onion, chopped
      • 1-2 tomatoes, peeled, seeded and chopped
      • 1/4 cup (45g) diced prunes
      • 1 tablespoon toasted sesame seeds
      • 1 clove garlic, chopped
      • ¼ teaspoon each: cinnamon, ground cloves, dried oregano, powdered cumin, ground coriander, ground anise seeds
      • 3/4 teaspoon salt, or to taste
      • freshly ground pepper
      • 3 cups of water (or more, as needed)
      • 1 oz (28g) unsweetened chocolate, melted
      • one can (400 g) cooked and peeled tomatoes
      In a small skillet, sauté onion in vegetable oil until soft and translucent. Add garlic and sauté another minute. Add spices and herbs and cook, stirring constantly, for about 30 seconds, being careful not to let them burn.In a blender, grind together the almonds, cooked onions, chiles, tomatoes, spices, prunes, sesame seeds, salt, pepper, and water. Puree until smooth. Melt the chocolate in the pan, add mole basis and the canned tomatoes and stir until completely combined, season again.

      Note: The original recipe uses 5 dried chiles. I liked the idea of the roasted chiles of the recipe given with the challenge and used 4 roasted Habanero chiles which was way to much. The sauce turned out to be delicious but to spicy to eat for us. We had to drink a lot of milk to be able to eat it ... The hint of chocolate was titillating my palate, next time I may add more.

      Enchiladas:
      • two boneless chicken breasts
      • oil
      • salt and pepper
      • 170 g cheddar, grated
      Heat a gas grill to medium high or build a medium-hot charcoal Coat the chicken with olive oil and season well with salt and pepper. Preheat oven to 450 degrees. Grill the chicken until just cooked through, 4-5 minutes a side for boneless chicken breasts (I used my grill pan which took longer, about 10 minutes a side). Cool and then slice into thin strips or shred. In a small skillet, heat 3 tablespoons oil over medium-high heat until very hot. Dip the edge of a tortilla into the oil to check - it should sizzle immediately. Using tongs, put a tortilla into the pan and cook until soft and lightly brown on each side, about 15-20 seconds per side (at the most). Drain on paper towels. Add oil as needed and continue until all 12 tortillas are done. In a baking dish large enough to hold four separate stacks of tortillas, ladle a thin layer of sauce. Lay four tortillas in the dish and ladle another ½ cup (4 ounces/112 grams) of sauce over the tortillas. Divide half the chicken among the first layer of tortillas, top with another ½ cup of sauce and 1/3 of the grated cheese. Stack another four tortillas, top with the rest of the chicken, more sauce and another third of the cheese. Finish with the third tortilla, topped with the remaining sauce and cheese. Bake until the sauce has thickened and the cheese melted, about 20 minutes. Let rest for 5-10 minutes.

      The stacks may also be cooked in individual gratin dishes - that is what I did.

      Daring Bakers April Challlenge - British Pudding

      The April 2010 Daring Bakers’ challenge was hosted by Esther of The Lilac Kitchen. She challenged everyone to make a traditional British pudding using, if possible, a very traditional British ingredient: suet.

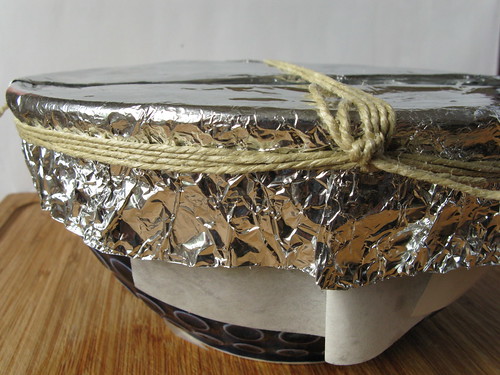
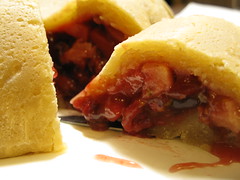
      I confess: This time I am too late. I made a pudding from my dessert book the 27th of the month, but never managed to take a picture.  After three more days of ignorance in my kitchen, the banana pudding with dulce the leche and macadamia nuts started to mold. I tried again today, this time a pudding with a crust, using apples, pistachios and berries (dried cranberries soaked in Contreau overnight and fresh raspberries) for the filling. After three hours of steaming, it was finished an hour ago. It was not bad, I guess we'll have the rest for dinner tomorrow. I am sorry I missed this one (never though I myself would steam pudding for hours after hearing horrible stories about christmas plum in school). It is a cold comfort, but I was daring a last.


      left: the dough for the crust (I used vegetable shortening)
      right: already filled (just the 'lid' is missing)

      ready for steaming


      Doesn't look that bad at all ... but is it done? Looks like - wanna have a slice?

      Blueberry and lemon curd swirl Tart

      I really wanted to post this recipe a long time ago, but like with most small things which get lost very fast the picture and the recipe got lost into the depths of my PC. This tart was basicially a left-over creation. As you may have recognised I'm in love with the lemon curd used in this cake and used it several times making desserts. I had some curd left and thought about using it for a tart filling, but it was supposed to contain some fruits and to be made quick and easy. The only thing I had at hand where some frozen blueberries but the flavour- and colour combination seemed to be promising to me. For the crust I used the (one and only) tart crust recipe which came with one of the Daring Bakers challenges (Bakewell tart).

      Crust:
      • 225g all purpose flour
      • 30g sugar
      • ½ tsp salt
      • 110g unsalted butter, cold (frozen is better)
      • 2 egg yolks
      • 2.5ml (½ tsp) almond extract (optional)
      • 1-2 Tbsp cold water
      Sift together flour, sugar and salt. Grate butter into the flour mixture, using the large hole-side of a box grater. Using your finger tips only, and working very quickly, rub the fat into the flour until the mixture resembles bread crumbs. Set aside. Lightly beat the egg yolks with the almond extract (if using) and quickly mix into the flour mixture. Keep mixing while dribbling in the water, only adding enough to form a cohesive and slightly sticky dough. Form the dough into a disc, wrap in cling and refrigerate for at least 30 minutes. Place the chilled dough disc on a lightly floured surface. Flour the rolling pin and roll the pastry to 5mm thickness. When the pastry is to the desired size and thickness, transfer it to the tart pan, press in and trim the excess dough. Patch any holes, fissures or tears with trimmed bits. Chill in the freezer for 15 minutes.
      Preheat oven to 180°C. Cover the dough with parchment paper and fill with dry peas, beans or rice. This will prevent the dough from rising. Bake for 15 minutes, remove the paper and filling and bake another 10 minutes or until golden brown. Let cool.

      Lemon curd:
      • 3 eggs
      • zest of 1 lemon
      • 110 grams sugar
      • 160 grams lemon juice
      • 1 sheet of gelatin
      • 50 grams butter, cut into small cubes
      Whisk the eggs, lemon zest and sugar together in a large bowl. Whisk in the lemon juice. Place the bowl over a water bath and whisk constantly until it thickens. It will start to make ribbons. In the meantime, have the gelatin softening in ice water. Squeeze out excess water and when curd has thickened, add the gelatin to the bowl. Strain this curd through a fine sieve into a clean bowl. Using a blender, start mixing the curd and adding the small pieces of butter. The curd will start to change in color and become lighter. Let cool for some hours. (As I had some leftovers, mine was ready for use.)

      Blueberry filling:
      • 300 g frozen or fresh blueberries
      • about 6-7 tablespoons dark fruit jam or jelly (blackberry, blueberry or similar)
      • one tabelspoon corn starch (only if you use frozen berries)
      Fill the lemon curd into a piping bag and use the curd making circles on the crust, starting on the outside, leaving 2-3 cm wide gaps in between. Fill the gaps with the blueberries or blueberry filling. For the filling, thaw the frozen ones and collect the juice. Mix with the corn starch in a small pot and heat until it thickens. Add the jam, beating so you prevent getting lumps. Let cool and stir in the blueberries. If using the fresh ones, warm the jam afterwards and spread carefully over the fruits.

      Daring Cooks April Challenge: Brunswick Stew

      This time I'm really late. Too late to be precise. For the first time - but not because of my usual late-posting-issues. In fact, I had everthing ready in my drawer one week earlier. Then my internet connection was cut off and it took a whole week to get it fixed -until today. Well, I was getting really bad withdrawal symptoms as I couldn't read all my favourite foodblogs - I really missed the food blogging world out there...

      The 2010 April Daring Cooks challenge was hosted by Wolf of Wolf's Den. She chose to challenge Daring Cooks to make Brunswick Stew. Wolf chose recipes for her challenge from The Lee Bros. Southern Cookbook by Matt Lee and Ted Lee, and from the Callaway, Virginia Ruritan Club.

      Brunswick Stew has a long, and oft debated history. Brunswick, Georgia claimed that the first Brunswick Stew was created there in 1898. There is, at the Golden Isles Welcome Center on Interstate 95, a bronzed stew pot with a plaque proclaiming this fact. However, Brunswick, Virginia claims that the first Brunswick Stew was created there by a camp cook named Jimmy Matthews in 1828, for a hunting expedition led by Dr. Creed Haskings, a member of the Virginia State Legislature for a number of years. He was said to have used squirrel in the original Brunswick Stew created for the group when they returned. The hunters were at first skeptical of the thick, hearty concoction, but upon tasting it, were convinced and asked for more. In the early 20th Cent, the rivalry of the two Brunswicks helped make this dish as popular as it is today, and it quickly became a pan-Southern classic. Some recipe call for the original addition of squirrel, but most allow for chicken, turkey, ham, or pork, even beef on occasion. Rabbit is also used. The vegetables can vary widely from variation to variation, however, the Brunswick Stewmasters recipe says *exactly* what is used in competion stews, and states that "Adding any additional ingredient(s) will disqualify the stew from being an original Brunswick Stew."

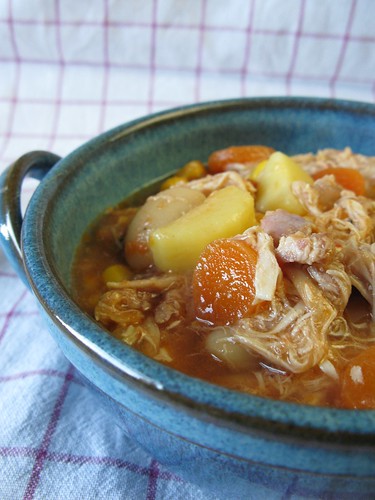
      We could choose between a short and a long version, and I wanted to be really daring and chose the long one. Another reason was that I have made stews before, and the ones you use boned meat tastes a lot better. Also I discover quite an interest in using rabbit meat for cooking. I had no problems with buying it and even found fresh one (thanks to the Easter holidays where Germans love to eat rabbit for obvious reasons). Normally I have to buy frozen meat made in China ... I cooked the stew on two consecutive days and halved all the ingredients - I had five large portions at the end from which three ended up in the freezer for the days I'm not a home and Robert is alone and hungry ;)


      Brunswick Stew - the -Long Way- recipe
      from "The Lee Bros. Southern Cookbook: Stories and Recipes for Southerners and Would-Be Southerners" by Matt Lee and Ted Lee

      serves about 12
      • 115 g slab bacon, rough diced
      • 2 Serrano, Thai or other dried red chiles, stems trimmed, sliced, seeded, flattened
      • 450 rabbit, quartered, skinned
      • 1800 g chicken, quartered, skinned, and most of the fat removed
      • 1 tablespoon sea salt for seasoning, plus extra to taste
      • 2-2,5 l chicken broth
      • 2 bay leaves
      • 2 large celery stalks
      • 900 g potatoes (waxy type) , peeled, rough diced
      • 340 g carrots (about 5 small carrots), chopped
      • about 4 medium onions, chopped
      • 450 g fresh corn kernels
      • 680 g butterbeans, preferably fresh
      • 990 g whole, peeled tomatoes, drained
      • 57 g red wine vinegar
      • juice of 2 lemons
      • Tabasco sauce to taste
      In the largest stockpot you have, fry the bacon over medium-high heat until it just starts to crisp. Transfer to a large bowl, and set aside. Reserve most of the bacon fat in your pan, and with the pan on the burner, add in the chiles. Toast the chiles until they just start to smell good, or make your nose tingle, about a minute tops. Remove to bowl with the bacon.
      Season liberally both sides of the rabbit and chicken pieces with sea salt and pepper. Place the rabbit pieces in the pot and sear off all sides possible. You just want to brown them, not cook them completely. Remove to bowl with bacon and chiles, add more bacon fat if needed, or olive oil, or other oil of your choice, then add in chicken pieces, again, browning all sides nicely. Remember not to crowd your pieces, especially if you have a narrow bottomed pot. Put the chicken in the bowl with the bacon, chiles and rabbit. Set it aside.
      Add 2 cups of your chicken broth or stock, if you prefer, to the pan and basically deglaze the4 pan, making sure to get all the goodness cooked onto the bottom. The stock will become a nice rich dark color and start smelling good. Bring it up to a boil and let it boil away until reduced by at least half. Add your remaining stock, the bay leaves, celery, potatoes, chicken, rabbit, bacon, chiles and any liquid that may have gathered at the bottom of the bowl they were resting in. Bring the pot back up to a low boil/high simmer, over medium/high heat. Reduce heat to low and cover, remember to stir every 15 minutes, give or take, to thoroughly meld the flavors. Simmer, on low, for approximately 1 ½ hours. Supposedly, the stock may become a yellow tinge with pieces of chicken or rabbit floating up, the celery will be very limp, as will the chiles. Taste the stock, according to the recipe, it "should taste like the best chicken soup you've ever had".

      - Here I stopped the first evening and put the pot into the refridgerator. The next day I had meat pieces enclosed into a delicious smelling jelly-like mass. At this point, I could have eaten it right away - cold - onto a fresh toasted bread. Some days later I repeated the steps above with without the rabbit, discarded the celery and added some noodles. It was the best chicken soup I had so far. -

      With a pair of tongs, remove the chicken and rabbit pieces to a colander over the bowl you used earlier. Be careful, as by this time, the meats will be very tender and may start falling apart. Remove the bay leaf, celery, chiles, bacon and discard (or don't - I didn't 'waste' the bacon and celery and kept it). After you've allowed the meat to cool enough to handle, carefully remove all the meat from the bones, shredding it as you go. Return the meat to the pot, throwing away the bones. Add in your carrots, and stir gently, allowing it to come back to a slow simmer. Simmer gently, uncovered, for at least 25 minutes, or until the carrots have started to soften.
      Add in your onion, butterbeans, corn and tomatoes. As you add the tomatoes, crush them up, be careful not to pull a me, and squirt juice straight up into the air, requiring cleaning of the entire stove. Simmer for another 30 minutes, stirring every so often until the stew has reduced slightly, and onions, corn and butterbeans are tender. Remove from heat and add in vinegar, lemon juice, stir to blend in well. Season to taste with sea salt, pepper, and Tabasco sauce if desired.


      You can either serve immediately or refrigerate for 24 hours, which makes the flavors meld more and makes the overall stew even better. Serve hot, either on its own, or with a side of corn bread, over steamed white rice, with any braised greens as a side.

      Chai coffee Pot the Crème

      Have you ever head of pot the creme? Not me before I stumbled upon it on one of my favourite foodblogs La Tartine Gourmande. If you ask all-knowing Wikipedia about this French dessert it just answers you: "Pot de crème is made with eggs, cream, milk, and a flavor, often vanilla. The mixture is then poured into ramekins which are then baked in a water bath." Basically it is the (more sophisticated) French version of our German Pudding (custard), which isn't made with eggs but with corn starch. Nobody in Germany I know makes Pudding from scratch (except me and my dear friend André of course who likes to use all chocolate rests he doesn't likes to eat ). Normally you just buy a package, cook milk, stir in powder and sugar - ready. So I wanted to try the French version which is very handy if you (like me) alway have eggs and milk in your fridge. The time I tried this recipe, I was in love with a instant chai coffee I found at my supermarket (right, I confess I too used instant stuff in some way) - and I love coffee flavour ...

      Chai coffee Pot the Crème
      for 6 small glas jars
      • 1 egg and 1 egg yolk
      • 1 tablespoon sugar
      • 250 ml milk
      • 1 teaspoon instant espresso powder
      • one package instant chai coffee (Krüger)
      In a pot, pour the milk bring to a boil. Mix in the espresso and chai coffee powder. Preheat your oven at 160°C. In a bowl, beat the eggs and egg yolk with the sugar, then add the hot milk slowly while beating. Pour the cream in small ramekins or jars and place them in a dish (or large baking mould) filled with hot water, so that they are half immersed. Place in the oven and cook for about 35 to 40 minutes. The middle of the creams should still be moving a little - the creams will settle once they cool down. Take the jars or ramekins out and let them cool down. Place a plastic wrap on top and place them in the fridge to rest for a few hours before eating.


      There are lot's of variations you can make according to the flavours and I've picked out some interesting recipes from my favourite food blogs:
      Potsdecremes.com (dessert history and recipes - even some savoury ones)
      Maple Pot the Crème from O Pistachio
      Chocolate and Vanilla Petits Pots de Crème from La Tartine Gourmande
      Chocolate and Raspberry Pot de Crème, Lemon Thyme Pot the Crème and Butterscotch Pot the Crème from Canelle et Vanille

      Daring Bakers March Challenge: Orange Tian

      The 2010 March Daring Baker's challenge was hosted by Jennifer of Chocolate Shavings. She chose Orange Tian as the challenge for this month, a dessert based on a recipe from Alain Ducasse's Cooking School in Paris.

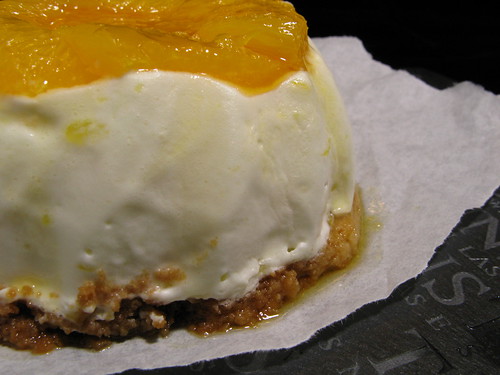
      There are quite a few steps to making this dessert; however a lot of them can be made in advance. The tian consists of a pate sablee (the bottom), orange marmalade, whipped cream, orange slices and caramel. It has to be build upside-down, starting with the orange slices, then the cream and the pate with the marmelade at last. You'll therefor need cookie cutters . Ideally, you should have about 6 cookie cutters to build the desserts in and cut the circles of dough. The cookie cutters will be the size of your final dessert, so they should be the size of an individually-sized tart mold. If you don't have round cookie cutters you could use an individually-sized cheesecake mold without its base. I used some of my dessert rings, a small bundt cake mould and (just for fun) a dinosaur cookie cutter (which was a christmas present of a good friend).

      What you can do in advance: The orange marmalade can be made several days ahead of time and the caramel sauce and orange segments preparation should be made the day before you make the dessert. As usual I wasn't as thoughtful as I'm writing here and made everything of the mentioned above two days ago (cause I had duty yesterday). I needed more preparing the tiramisu, but this time I struggeled more. One of the things I hate most is making orange slices - juice everywhere, burning hands and oranges some fall apart ... The result was quite good although I don't like that much cream in my desserts. I used the rests for another cake (taking it to the job tomorrow) and can't wait to try this one too ...


      Orange Tian

      for the Pate Sablee:
      • 2 medium-sized egg yolks at room temperature
      • 80 grams granulated sugar
      • ½ teaspoon vanilla extract
      • 100 grams unsalted butter, ice cold, cubed
      • 2 grams salt
      • 200 grams all-purpose flour
      • 4 grams baking powder
      Put the flour, baking powder, ice cold cubed butter and salt in a food processor fitted with a steel blade (works also fine with your fingers if you don't have a food processor). In a separate bowl, add the eggs yolks, vanilla extract and sugar and beat with a whisk until the mixture is pale. Pour the egg mixture in the food processor. Process until the dough just comes together. If you find that the dough is still a little too crumbly to come together, add a couple drops of water and process again to form a homogenous ball of dough. Form into a disc, cover with plastic wrap and leave to rest in the fridge for 30 minutes. Preheat your oven to 180 °C.
      Roll out the dough onto a lightly floured surface until you obtain a ¼ inch thick circle. Using your cookie cutter, cut out circles of dough and place on a parchment (or silicone) lined baking sheet. Bake for 20 minutes or until the circles of dough are just golden.

      for the marmalade:
      • 100 grams freshly pressed orange juice 1 large orange used to make orange slices
      • cold water to cook the orange slices
      • 5 grams pectin
      • granulated sugar: use the same weight as the weight of orange slices once they are cooked
      Finely slice the orange. Place the orange slices in a medium-sized pot filled with cold water. Simmer for about 10 minutes, discard the water, re-fill with cold water and blanch the oranges for another 10 minutes. Blanch the orange slices 3 times. This process removes the bitterness from the orange peel, so it is essential to use a new batch of cold water every time when you blanch the slices.Once blanched 3 times, drain the slices and let them cool. Once they are cool enough to handle, finely mince them (using a knife or a food processor). Weigh the slices and use the same amount of granulated sugar . If you don't have a scale, you can place the slices in a cup measurer and use the same amount of sugar. In a pot over medium heat, add the minced orange slices, the sugar you just weighed, the orange juice and the pectin. Cook until the mixture reaches a jam consistency (10-15 minutes). Transfer to a bowl, cover with plastic wrap and put in the fridge.

      for the orange segments:

      For this step you will need 8 oranges. Cut the oranges into segments over a shallow bowl and make sure to keep the juice. Add the segments to the bowl with the juice.

      for the caramel:
      • 200 grams granulated sugar
      • 400 grams orange juice
      Place the sugar in a pan on medium heat and begin heating it. Once the sugar starts to bubble and foam, slowly add the orange juice. As soon as the mixture starts boiling, remove from the heat and pour half of the mixture over the orange segments. Reserve the other half of the caramel mixture in a small bowl - you will use this later to spoon over the finished dessert. When the dessert is assembled and setting in the freezer, heat the kept caramel sauce in a small saucepan over low heat until it thickens and just coats the back of a spoon (about 10 minutes). You can then spoon it over the orange tians.

      for the whipped cream:
      • 200 grams heavy whipping cream
      • 3 tablespoons of hot water
      • 1 tsp Gelatine
      • 1 tablespoon of confectioner's sugar
      • orange marmalade (see recipe above) 1 tablespoon
      In a small bowl, add the gelatine and hot water, stirring well until the gelatine dissolves. Let the gelatine cool to room temperature while you make the whipped cream. Combine the cream in a chilled mixing bowl. Whip the cream using a hand mixer on low speed until the cream starts to thicken for about one minute. Add the confectioner sugar. Increase the speed to medium-high. Whip the cream until the beaters leave visible (but not lasting) trails in the cream, then add the cooled gelatine slowly while beating continuously. Continue whipping until the cream is light and fluffy and forms soft peaks. Transfer the whipped cream to a bowl and fold in the orange marmalade.


      Assembling:

      Make sure you have some room in your freezer. Ideally, you should be able to fit a small baking sheet or tray of desserts to set in the freezer. Line a small tray or baking sheet with parchment paper or a silicone sheet. Lay out 6 cookie cutters onto the parchment paper/silicone. Drain the orange segments on a kitchen towel. Have the marmalade, whipped cream and baked circles of dough ready to use. Arrange the orange segments at the bottom of each cookie cutter. Make sure the segments all touch either and that there are no gaps. Make sure they fit snuggly and look pretty as they will end up being the top of the dessert. Arrange them as you would sliced apples when making an apple tart.Once you have neatly arranged one layer of orange segments at the bottom of each cookie cutter, add a couple spoonfuls of whipped cream and gently spread it so that it fills the cookie cutter in an even layer. Leave about 1/4 inch at the top so there is room for dough circle. Using a butter knife or small spoon, spread a small even layer of orange marmalade on each circle of dough.Carefully place a circle of dough over each ring (the side of dough covered in marmalade should be the side touching the whipping cream). Gently press on the circle of dough to make sure the dessert is compact. Place the desserts to set in the freezer to set for 10 minutes.
      Using a small knife, gently go around the edges of the cookie cutter to make sure the dessert will be easy to unmold. Gently place your serving plate on top of a dessert (on top of the circle of dough) and turn the plate over. Gently remove the cookie cutter, add a spoonful of caramel sauce and serve immediately.